

I posted on Terraform and Azure SQL last year but wanted to see what Bicep could do this year. I’m going to test Bicep out with Elastic Jobs.
TL;DR—My bicep code is on GitHub. Please read this post before you do the Bicep code.
Here are some great links from Microsoft to help you on your Bicep journey in general and, more specifically, with Elastic Jobs. I will walk you through the Bicep for the Elastic Job below if you want more detailed guidance from me.
- For SQL Server varieties in Azure, and lots of other templates, as well- https://github.com/Azure/azure-quickstart-templates/tree/master/quickstarts/microsoft.sql
- Microsoft doesn’t seem to have anything about Elastic Jobs in that Github repo, so here are a couple of links to that. I will walk you through this Elastic Jobs setup and give you some tips and tricks. I will also show you how to set up alerts.
https://learn.microsoft.com/en-us/azure/templates/microsoft.sql/servers/jobagents?pivots=deployment-language-bicep
https://learn.microsoft.com/en-us/azure/templates/microsoft.sql/servers/jobagents/jobs?pivots=deployment-language-bicep
What is Bicep?
Bicep is an open-source Domain-Specific Language (DSL) that simplifies the process of deploying Azure resources. It is an abstraction layer on top of Azure Resource Manager (ARM) templates, making it easier to write and understand infrastructure code. Bicep lets you describe your Azure infrastructure using a cleaner and more concise syntax than traditional ARM templates.
Why Use Bicep?
The complexity of ARM templates often presents a steep learning curve for beginners and can be cumbersome to maintain for experienced developers. Bicep addresses these pain points by offering the following benefits:
- Simplicity: Bicep’s syntax is declarative and human-readable, making it easier to understand and maintain than verbose ARM templates.
- Abstraction: Bicep abstracts away much of the complexity inherent in ARM templates, allowing developers to focus on defining the desired state of their infrastructure without getting bogged down in implementation details.
- Reusability: Bicep supports modularization, enabling developers to encapsulate common patterns and components for reuse across projects, thereby promoting code consistency and reducing duplication.
- Type Safety: Bicep provides type safety and compile-time validation, catching errors early in development and reducing the likelihood of runtime failures.
- Integration: Bicep seamlessly integrates with existing Azure tools and workflows, including Azure CLI, Azure PowerShell, and Azure DevOps, making it a natural choice for Azure-centric projects.
- Stateless Operation: Bicep eliminates the need to manage state files, simplifying the deployment process and reducing complexity.
- Cost-Effectiveness: Bicep is free to use and does not incur any licensing fees, making it a cost-effective solution for managing Azure infrastructure.
How to Use Bicep
You can use Bicep with many different tools. I prefer to use Visual Studio Code with the Bicep extension. Add the extension in VS Code, which will recognize your Bicep files and help you auto-complete your Bicep code.

You also need to install Bicep. I ran this in the VS Code terminal. Note: You must be logged into Azure to deploy Bicep. I’m not covering that in this post. Hint: This might work.

Here’s how you can install Bicep.
az bicep install If you need to upgrade, you can use this.
az bicep upgrade You can use this to check your current version.
az bicep version Bicep Existing Resources
I find it’s pretty cool how you can get Bicep for your existing resources. In this way, Bicep is quite nice because you can at least get a great starting point. The Bicep isn’t always deploy-ready based on what is generated via this process below, but it’s quite close. It’s a huge improvement over trying to figure out how to Terraform existing resources, that’s for sure.
I have a post that walks you through how to set all of this up manually, and it also outlines how to set up all the target groups, jobs, and job steps with T-SQL. I will use these methods to set up the items needed for Bicep today. IMPORTANT: The previous post contains things set up on the db side that you won’t be doing with Bicep – and your Elastic Jobs won’t work without them. Specifically, you must add the managed identity to your SQL databases so the Elastic Job can access it and the Ola objects to any db that’s not excluded from your Elastic job.
Bicep Azure SQL DB
I set up an Azure SQL DB and an Elastic Job agent to get VS Code to generate the Bicep for me. Go to your resource in Azure. On the Overview page, click JSON View.

Copy the Resource ID.

Now we go into VS Code. Create a .bicep file. I named mine elastic-jobs.bicep. Then, go to View-> Command Palette – or use the keyboard shortcut for your OS.

Then type in the box bicep, which will bring up options – one of which is Bicep: Insert Resource. Click on that option.

It will bring up another box, and you will paste your resourceid into it.

Hit Enter, and it will create some Bicep for you in that Bicep file you created. Now, it will have the Bicep for your Azure SQL DB, but it will include some stuff you can’t use. Since you have the Bicep extension, it will help highlight those issues for you, though. You need to look at anything with squiggly underlines.

In this case, it’s all read-only stuff, meaning you can’t call it from Bicep, so I removed those. And I wound up with this Bicep code. Note: The minimum db specs for an Elastic Job agent is S1, so the capacity is 20, which means 20 DTU.
resource SQLElasticJobAgentDB 'Microsoft.Sql/servers/databases@2023-08-01-preview' = {
  sku: {
    name: 'Standard'
    tier: 'Standard'
    capacity: 20
  }
  properties: {
    collation: 'SQL_Latin1_General_CP1_CI_AS'
    maxSizeBytes: 268435456000
    catalogCollation: 'SQL_Latin1_General_CP1_CI_AS'
    zoneRedundant: false
    readScale: 'Disabled'
    requestedBackupStorageRedundancy: 'Geo'
    isLedgerOn: false
    availabilityZone: 'NoPreference'
  }
  location: 'eastus2'
  tags: {}
  name: 'yourdbservername/SQLElasticJobAgentDB'
}
Bicep Elastic Job Agent
You will also need to do the same for the Elastic Job agent and wind up with code like this.
resource SQLElasticJobAgent 'Microsoft.Sql/servers/jobAgents@2023-08-01-preview' = {
  sku: {
    name: 'JA100'
    capacity: 100
  }
  identity: {
    type: 'UserAssigned'
    userAssignedIdentities: {
      '/subscriptions/yoursubid/resourcegroups/yourrgname/providers/Microsoft.ManagedIdentity/userAssignedIdentities/ElasticAgentJobsManagedID': {
      }
    }
  }
  properties: {
    databaseId: '/subscriptions/yoursubid/resourceGroups/yourrgname/providers/Microsoft.Sql/servers/yoursqlservername/databases/SQLElasticJobAgentDB'
  }
  location: 'eastus2'
  tags: {}
  name: 'yourdbservername/SQLElasticJobAgent'
}
I have the bare-bones Elastic Job setup in place, but I will need the target groups, jobs, and job steps. Normally, I would run all the scripts from the previous blog post to get those in place and then run the Bicep: Insert Resource for my Elastic Job agent, but I wanted to show you the very basics first. So, now I will run those scripts to get the other bits in place and then re-run the Bicep: Insert Resource for the Elastic Jobs agent. That code will look like this now.
// we need to create some target groups and add some members to exec our jobs on
resource SQLElasticJobAgentTargetGroup 'Microsoft.Sql/servers/jobAgents/targetGroups@2023-08-01-preview' = {
  name: 'AzureSQLDBs'
  parent : SQLElasticJobAgent
  properties: {
    members: [
      {
        membershipType: 'Include'
        type: 'SqlServer'
        serverName: 'yourdbservername.database.windows.net'
      }
      {
        membershipType: 'Exclude'
        type: 'SqlDatabase'
        serverName: 'yourdbservername.database.windows.net'
        databaseName: 'db1'
      }
      {
        membershipType: 'Exclude'
        type: 'SqlDatabase'
        serverName: 'yourdbservername.database.windows.net'
        databaseName: 'db2'
      }
      {
        membershipType: 'Include'
        type: 'SqlServer'
        serverName: 'yourdbservername2.database.windows.net'
      }
    ]
  }
}

/* we need to create a job to run on the target group - I set mine to run once a day at 11pm UTC */
resource SQLElasticJobAgentJob 'Microsoft.Sql/servers/jobAgents/jobs@2023-08-01-preview' = {
  name: 'OlaStatsUpdateJob'
  parent: SQLElasticJobAgent
  properties: {
    schedule: {
      enabled: true
      startTime: '2024-04-16T23:00:00Z'
      endTime: '9999-12-31T11:59:59Z'
      interval: 'P1D'
      type: 'Recurring'
    }
  }
}

/* we need to add steps to the job so something actually executes :)
   don't change the spacing on the sql because it breaks the bicep
   in this case step 1 runs ola stats update and step 2 runs cleanup on the commandlog table
*/

resource SQLElasticJobAgentJobStep1 'Microsoft.Sql/servers/jobAgents/jobs/steps@2023-05-01-preview' = {
  name: 'StatsUpdateStep'
  parent: SQLElasticJobAgentJob
  properties: {
    action: {
      source: 'Inline'
      type: 'TSql'
      value: 'EXECUTE [dbo].[IndexOptimize]\n            @Databases = \'USER_DATABASES\' ,\n            @FragmentationLow = NULL ,\n            @FragmentationMedium = NULL ,\n            @FragmentationHigh = NULL ,\n            @UpdateStatistics = \'ALL\' ,\n            @LogToTable = \'Y\';'
    }
  stepId: 1
  targetGroup: SQLElasticJobAgentTargetGroup.id
  }
}

resource SQLElasticJobAgentJobStep2 'Microsoft.Sql/servers/jobAgents/jobs/steps@2023-05-01-preview' = {
  name: 'CleanUpCommandLogStep'
  parent: SQLElasticJobAgentJob
  properties: {
    action: {
      source: 'Inline'
      type: 'TSql'
      value: 'DELETE FROM [dbo].[CommandLog]\n              WHERE StartTime <= DATEADD(DAY, -30, GETDATE());'
    }
  stepId: 2
  targetGroup: SQLElasticJobAgentTargetGroup.id
  }
}
Deploying Bicep
I will put all this into an existing resource group because I also want to put the db on an existing server. If you need to create a new Azure SQL Server for your db, then it’s as easy as using some Bicep to create it – or creating it manually and following the above process to Bicep that new Azure SQL Server.
Run this in the terminal using VS Code. Note: This path is for Mac. Change the forward slash to a backslash on PC. Also, this is a relative path to the file, so you need to figure out your relative path.
az deployment group create -g 'yourrgname' -f ./my-bicep/elastic-jobs.bicep -cNote: The -c on this command. It won’t deploy the resources; instead, it will output what it could deploy to the screen. Then, you can choose whether to deploy or not at that point. If you don’t want to go through the pre-check, you can remove the -c. I highly recommend the precheck.
When you run it, you will see a bunch of warnings. It will still deploy with yellow, it’s when you have red, that’s when it stops. It likes to let you know when you could optimize your code.

Depending on what you already have set up in your environment, you will get some variation on these changes. Typing y and hitting enter puts them in place. Make sure to review them before you say yes. Above this prompt, there is a list of everything it will do.

Then, it will sit on this for a while as it deploys.
If it deploys without error, it will look pleasantly unassuming. If you get an error, you will know because it will show a lot of red, explaining why there is an error.
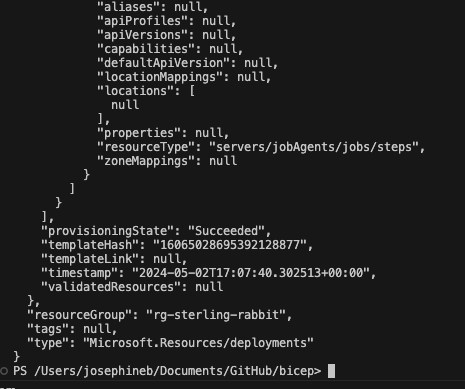
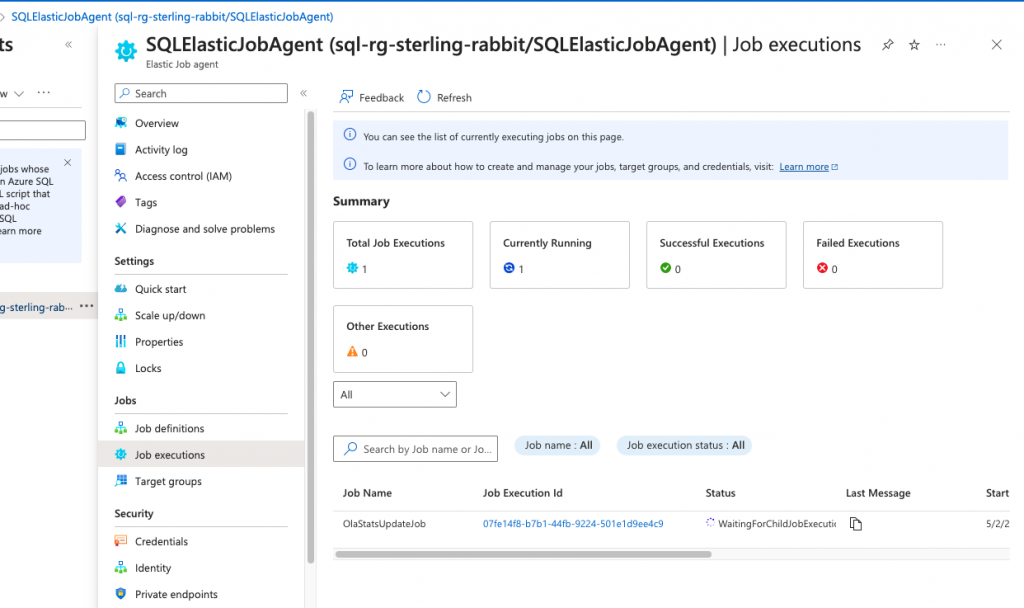
You will see your job executing in there now even though you told it not to execute until later on a schedule. Don’t ask me, as I don’t know, but it seems when you enable the job, it likes to run right away, so account for that if it’s an issue for you. I’m just doing a stats update, so it’s lightweight, but I will have to sort it out in more detail when I get to heavier-weight jobs like index maintenance.
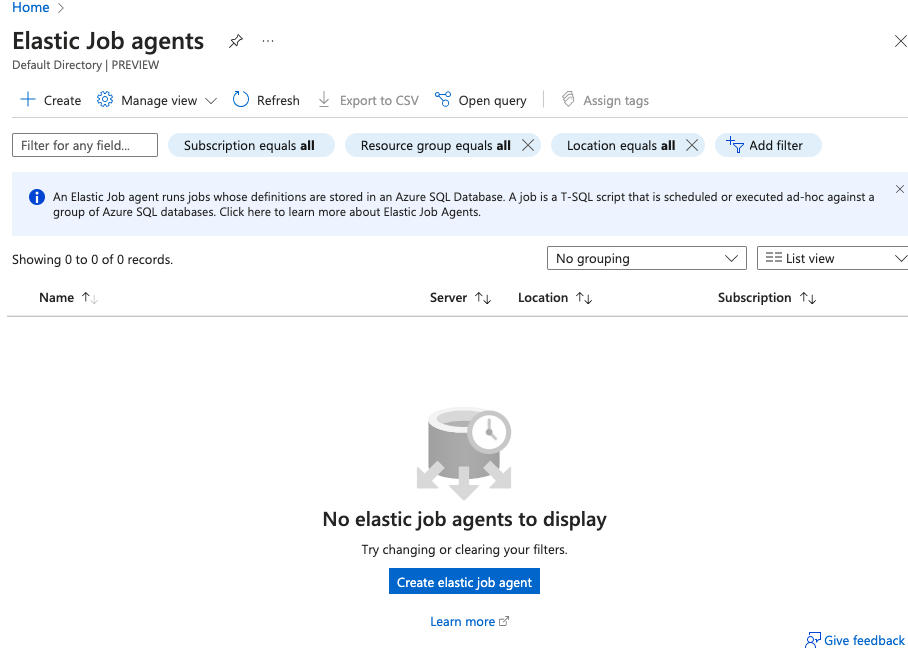
But then I delete the resources from the portal and re-run the Bicep to ensure it puts everything back in place. Now, I get you can’t always delete your resources to test your Bicep from scratch fully, but in this case, I will because I want to show you what it will look like if you start from nothing and just use the Bicep without resources in place. You can see my Elastic Job agent is gone.
I will re-run this code.
az deployment group create -g 'yourrgname' -f ./my-bicep/elastic-jobs.bicep -cNow I have “6 create, 46 to ignore.” Here’s a cross-section of what it will list for you. Type y and hit enter if you are happy with what it will do.

It will put everything back in place. You might get an error like this. If you do, check that Bicep created the db and re-run your deployment. It might be because of a delay in creating the db, so the agent creation fails without it.
"The resource write operation failed to complete successfully, because it reached terminal provisioning state 'Failed'.","details":[{"code":"DatabaseDoesNotExist","message":"Database 'SQLElasticJobAgentDB' does not exist."}]}]}
And now it’s back in place.

You can also deploy by right-clicking on the file. I don’t like this method and prefer the command line to deploy as it will output the issues there. You must go into the portal using this right-click method to see the deployment.

Alerting on Elastic Jobs
You will want to know if the jobs fail, right? Otherwise, it’s sort of useless. I will show you how to set up two alerts: one for failed jobs and one for timed-out jobs.
Since I previously set up these alerts manually, I will pull them into Bicep via Bicep: Insert Resource in VS Code. You will also need an action group, which I will add to my Bicep.
// action group for alerts
resource dbactiongroup 'Microsoft.Insights/actionGroups@2023-01-01' = {
  name: 'dbactiongroup'
  location: 'Global'
  properties: {
    groupShortName: 'dbactgrp'
    enabled: true
    emailReceivers: [
      {
        name: 'sendtome'
        emailAddress: 'youremail@domain.com'
        useCommonAlertSchema: true
      }
    ]
  }
}

// alert for elastic job failed
resource ElasticJobFailed 'Microsoft.Insights/metricAlerts@2018-03-01' = {
  name: 'ElasticJobFailed'
  location: 'global'
  tags: {}
  properties: {
    description: ''
    severity: 1
    enabled: true
    scopes: [
      '/subscriptions/yoursubid/resourceGroups/yourrgname/providers/Microsoft.Sql/servers/yoursqlservername/jobAgents/SQLElasticJobAgent'
    ]
    evaluationFrequency: 'PT1M'
    windowSize: 'PT5M'
    criteria: {
      allOf: [
        {
          threshold: json('0.0')
          name: 'Metric1'
          metricNamespace: 'Microsoft.Sql/servers/jobAgents'
          metricName: 'elastic_jobs_failed'
          operator: 'GreaterThan'
          timeAggregation: 'Total'
          skipMetricValidation: false
          criterionType: 'StaticThresholdCriterion'
        }
      ]
      'odata.type': 'Microsoft.Azure.Monitor.SingleResourceMultipleMetricCriteria'
    }
    autoMitigate: true
    targetResourceType: 'Microsoft.Sql/servers/jobAgents'
    targetResourceRegion: 'eastus2'
    actions: [
      {
        actionGroupId: '/subscriptions/yoursubid/resourcegroups/yourrgname/providers/microsoft.insights/actiongroups/dbactiongroup'
        webHookProperties: {}
      }
    ]
  }
}

// alert for elastic job timed out
resource ElasticJobTimedOut 'Microsoft.Insights/metricAlerts@2018-03-01' = {
  name: 'ElasticJobTimedOut'
  location: 'global'
  tags: {}
  properties: {
    description: ''
    severity: 1
    enabled: true
    scopes: [
      '/subscriptions/yoursubid/resourceGroups/yourrgname/providers/Microsoft.Sql/servers/yoursqlservername/jobAgents/SQLElasticJobAgent'
    ]
    evaluationFrequency: 'PT1M'
    windowSize: 'PT5M'
    criteria: {
      allOf: [
        {
          threshold: json('0.0')
          name: 'Metric1'
          metricNamespace: 'Microsoft.Sql/servers/jobAgents'
          metricName: 'elastic_jobs_timeout'
          operator: 'GreaterThan'
          timeAggregation: 'Total'
          skipMetricValidation: false
          criterionType: 'StaticThresholdCriterion'
        }
      ]
      'odata.type': 'Microsoft.Azure.Monitor.SingleResourceMultipleMetricCriteria'
    }
    autoMitigate: true
    targetResourceType: 'Microsoft.Sql/servers/jobAgents'
    targetResourceRegion: 'eastus2'
    actions: [
      {
        actionGroupId: '/subscriptions/yoursubid/resourcegroups/yourrgname/providers/microsoft.insights/actiongroups/dbactiongroup'
        webHookProperties: {}
      }
    ]
  }
}
You will get an email like this if your job fails or times out.

I’m used to Terraform, but I actually like Bicep. It’s nice you don’t have to worry about the state file because Azure is your state. It’s super nice you get a lot of help with Bicep by having VS Code help you create Bicep for existing resources, as you can’t do that with Terraform. I could see a lot of great uses for Bicep, especially if you are fully in Azure. There’s way more to Bicep, as well. I only showed you a very basic example. I highly recommend using parameters and variables and setting up modules to really do this thing right. This way, you can use Azure DevOps to deploy your Bicep code more efficiently.