
This is a super simple way to retain the data and settings that you create and change on your PostgreSQL Docker instance. There’s a lot of talk about attaching databases after you recreate your Docker container, but I found that it’s easier to have persistent storage instead, and if you remove the container you can recreate it and mount the same local drives without losing any data or settings. It’s great and simple!
This article assumes you have a working knowledge of containerization and PostgreSQL, but may provide enough detail to get you up and running with very little knowledge on either.
So, you will need to install Docker on your local machine and have it set to use Linux containers. https://docs.docker.com/get-docker/
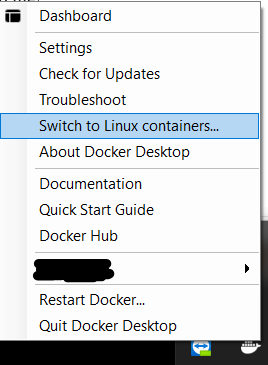
I don’t remember whether it runs Windows or Linux containers by default, but you can right-click the Docker icon in the system tray, and choose “Switch to Linux containers…” If you have anything running as a Windows container already, then they will continue to run, but you won’t be able to manage them until you switch back to Windows containers. Sounds good to me!
When you right-click the Docker icon in the system tray, if you see “Switch to Windows containers…” then you are already on Linux, and can skip to the section on Let’s set up this PostgreSQL container! Otherwise, click “Switch to Linux containers…” as shown in the following screenshot.
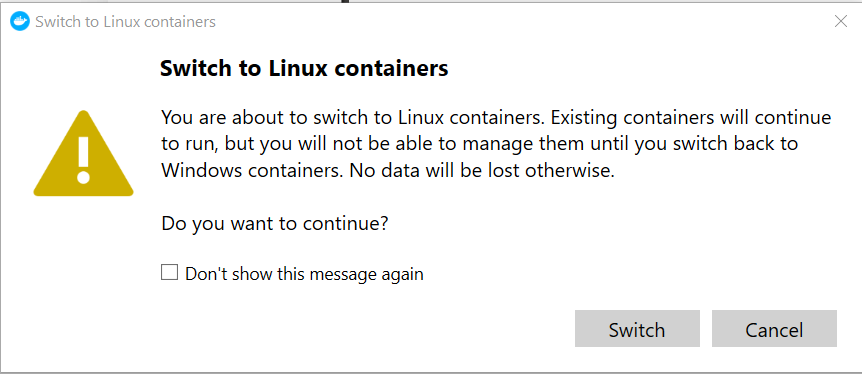
It will warn you about switching and not being able to manage. You can choose to not show this message again (or not, it’s up to you), and then click Switch as shown in the following screenshot.
You will probably get a message in the lower right corner of your screen saying Docker Desktop is switching…

It doesn’t take very long in my experience, but I guess they are working on the model of under promise and over deliver, or maybe it’s just because I don’t have a lot of containers running, or I don’t know what would made this switch take a long time.
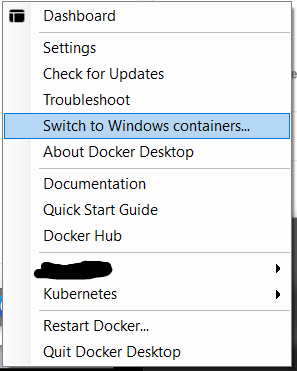
Anyway, you wait until the switch is done. You can right-click the Docker icon in the system tray again, and see that it now shows “Switch to Windows containers…”
Now, you are good to go to setup PostgreSQL on Docker with a Linux image.
Let’s set up this PostgreSQL container!
First things first, set up a folder on your local machine that you will map to your container. I just set up a folder structure here: C:\docker\postgres, but you can name your folder whatever you want making sure to update it in the code below.
Then you will run the following code at the command line:
docker run --name pg-docker -e POSTGRES_PASSWORD=postgres -d -p 54320:5432 -v C:\docker\postgres:/var/lib/postgresql/data postgresLet’s do a quick breakdown of what we are doing in the docker run script above:
- docker run – standard way to start a Docker container
- -e – is setting the postgres user password
- -p – I’m setting the port on my host to 54320 because 5432 is already in use, and 54320 will map back to 5432 in the container. When setting these flags, it’s always host then container, so -p hostport:containerport. You can also choose to map the container to the host port 5432, but I already had 5432 in use. If you want to map the container to host 5432, just use 5432:5432 instead.
- –name – names the container. If you leave this off, then it gets a random name.
- -v – maps a volume from the host to the container. In this case, I’m mapping the default container data directory to a folder on my host. I’m also setting the secrets to map to the host so nothing is lost when removing the container. This will ensure any changes you make to the system dbs will be saved and any new dbs you add will also be saved, even if you remove the container, the host folder and it’s data will not go away.
- -d – this builds the container in the background. If you want to see everything it does at the command line, you can leave this off, but it’s a lot of output to the screen telling you every single thing it’s doing as it creates the container.
- postgres – gets the latest postgres image to use in your container
So, now open your command line, if you haven’t done so already, and get this container setup!
When the code has finished, it will spit out some random GUID.
Note: if this is the first time using this image, it will need to be downloaded as part of the container creation (you don’t have to download it beforehand), but once it’s downloaded, it won’t have to download it again (unless you purposefully remove the image in the future).
To see the status of your container, run docker ps at the command line. This will display a list of your running containers and their status:

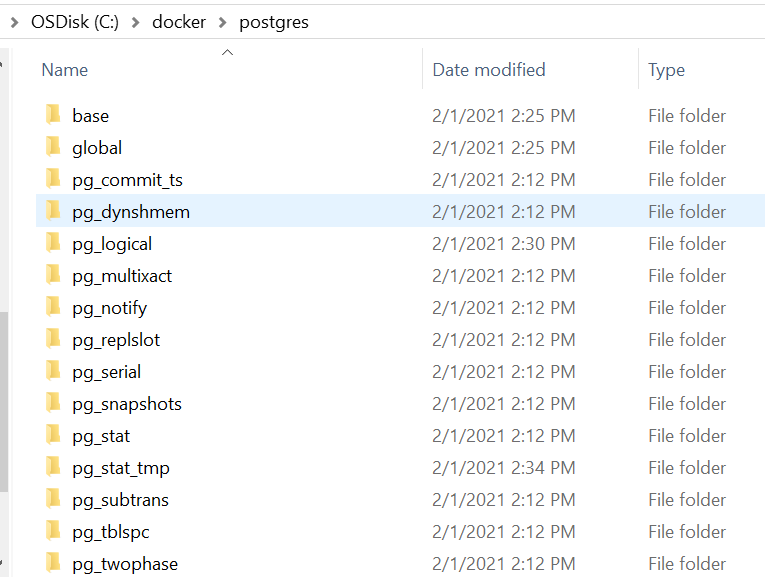
If you look in your host folder, it won’t be empty, and it contains the secrets and data folders that are mapped to your container. The data folder has your system dbs (and will also hold your user dbs once you create some) and the secrets folder contains the machine-key file.
Connecting via pgAdmin
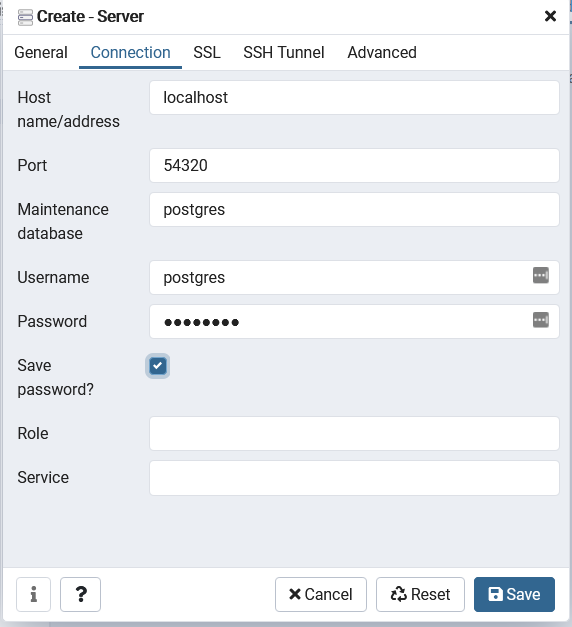
Once you confirm your Docker container is running, you can connect to it via pgAdmin. Get pgAdmin here and there’s lots of documentation on how to use it: https://www.pgadmin.org/download/
You will use the name localhost, and if you mapped the container to port 54320 on your host, then you will use localhost and port 54320.
Making changes to PostgreSQL
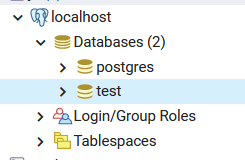
Let’s make some changes here so we can test if they come back when the container is removed and recreated. I’m just going to add a db named Test.
How to get your data and settings back if you remove the container
Since we’ve changed settings in the last section, and this is the kind of thing that won’t be remembered if you remove you container without having volumes mapped from your host to your container, let’s remove the container to see how the setting changes will be reflected because we mapped the volumes with the first creation of the container and we will once again map the volumes. Let’s stop and remove the container:
To stop the container at command line: docker stop pg-docker
To remove the container at command line: docker rm pg-docker
You can double-check the container is gone by running docker ps at the command line, but it’s not necessary.
Next, you can run the same docker run command as when you set it up the first time (as long as you didn’t remove the folder that lives on your host computer and I don’t think you would have done that 🙂 and I know that Docker didn’t do that with the container removal):
docker run --name pg-docker -e POSTGRES_PASSWORD=postgres -d -p 54320:5432 -v C:\docker\postgres:/var/lib/postgresql/data postgresOnce it’s done, then connect to pgAdmin again and you will see the changes you made as expected without any additional steps! So nice, no additional work needed and it remembers what you did as long as you map the volumes!
The whole point of this exercise for me was to get PostGIS working. It turns out you need to use a different Postgres docker image to use PostGIS. More to come on this in a future post.