

This is an easy way to retain the data and settings you create and change on your SQL Server Docker instance. There’s a lot of talk about attaching databases after creating your Docker container. I found that you can mount the volumes that SQL Server uses to hold the system and user databases to a folder on your local drive. If you remove the container, you can recreate it and mount the same local drives without losing any data or settings.
This article assumes you have a working knowledge of containerization and SQL Server. However, it may provide enough detail to get you up and running with no prior knowledge.
Why Docker?
I’m setting up Docker so that I have a local environment to test DDL scripts before I push them through change control. I also did a workaround where I set up linked servers to run some Azure SQL database stats updates until I can figure out how to set up a Runbook with Terraform.
Installing and Configuring Docker
You will need to install Docker on your local machine and set it to use Linux containers. https://docs.docker.com/get-docker/
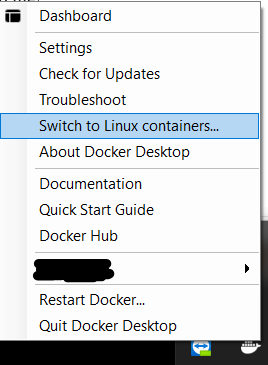
I don’t remember whether it runs Windows or Linux containers by default. However, you can right-click the Docker icon in the system tray, and choose “Switch to Linux containers…” If you already have anything running as a Windows container, they will continue to run, but you won’t be able to manage them until you switch back to Windows containers. Sounds good to me!
When you right-click the Docker icon in the system tray, if you see “Switch to Windows containers…” then you are already on Linux, and can skip to the section on Let’s set up this SQL Server container! Otherwise, click “Switch to Linux containers…” as shown in the following screenshot.
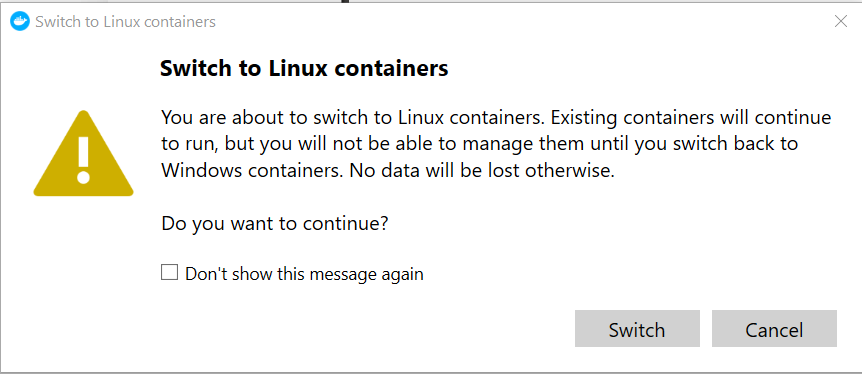
It will warn you about switching.
You will probably get a message in the lower right corner of your screen saying Docker Desktop is switching…

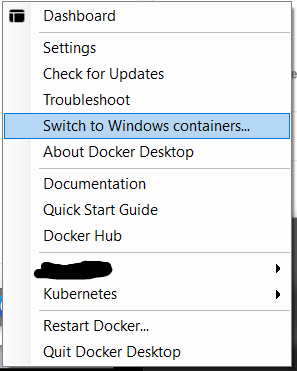
You can right-click the Docker icon in the system tray again, and see that it now shows “Switch to Windows containers…”
Now, you are ready to set up SQL Server on Docker with a Linux image.
Set Up SQL Server Container
First things first, set up a folder on your local machine that you will map to your container. I set up a folder structure here: C:\docker\sql2019 because I’m using the latest SQL Server 2019 version on Ubuntu, but you can name your folder whatever you want. Note: I’m using the Linux image because I tried the Windows one and it’s old and no good. I’ve read that Microsoft isn’t maintaining Windows SQL Server images for Docker and you should use Linux images.
Then you will run the following code on the command line:
docker run -e "ACCEPT_EULA=Y" -e "MSSQL_SA_PASSWORD=thisisastrongpassw0rd!" -p 1436:1433 --name sql2019 -v c:/docker/sql2019/data:/var/opt/mssql/data -v c:/docker/sql2019/secrets:/var/opt/mssql/secrets -d mcr.microsoft.com/mssql/server:2019-latestLet’s break down what we do in the Docker run script above:
- docker run – Standard way to start a Docker container
- -e – Accepting the license of SQL Server (EULA) and setting the SA password. Please note: make sure you set a strong password otherwise the container will appear to be working correctly, but is not accessible and hangs on an error saying the password doesn’t meet requirements.
You can follow the container logs using this command:
docker logs -f <containerid> - -p – I’m setting the port on my host to 1436 because 1433 may already be in use with a SQL Server install. 1436 will map back to 1433 in the container. When setting these flags, it’s always host then container, so -p hostport:containerport. You can also map the container to the host port 1433 if you aren’t using 1433 on your local machine already. If you want to map the container to host 1433, use 1433:1433 instead.
- –name – The name of the container. If you leave this blank, it gets a random name.
- -v – Maps a volume from the host to the container. In this case, I’m mapping the default container data directory to a folder on my host. I’m also setting the secrets to map to the host. This will ensure any changes you make to the system dbs will be saved and any dbs you add will also be saved. Even if you remove the container, the host folder and its data will not disappear.
- -d – This builds the container in the background. If you want to see everything it does on the command line, you can leave this off. However, there’s a lot of output on the screen telling you everything it does as it creates the container.
- mcr.microsoft.com/mssql/server:2019-latest – Gets the latest 2019 SQL Server image to use in your container
When the code finishes, it gives you a random GUID:

Note: If this is the first time using this image, you will need to download it so you will see something like the screenshot below. You won’t need to download it again (unless you remove the image in the future).

Container Status
To see the status of your container, run docker ps on the command line. This will display a list of your running containers and their status:

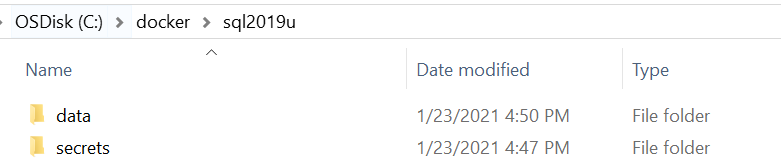
If you look in your host folder, it won’t be empty. It contains the secrets and data folders mapped to your container. The data folder contains your system dbs (and will also hold your user dbs once you create some) and the secrets folder contains the machine-key file.
Connecting via SSMS
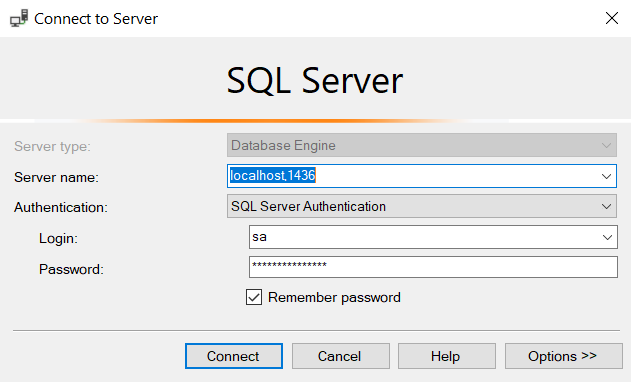
Once you confirm your Docker container is running, you can connect to it via SSMS. You will use the name localhost, and if you mapped the container to port 1436 on your host, you will specify localhost,1436. If you decided to map to 1433 on your host, you won’t need the port, instead, use localhost.
Note: If you get an error like “A connection was successfully established with the server, but then an error occurred during the pre-login handshake.”, it may look like the Docker container is ready, but it may still be loading. Check the logs at the command line to make sure it’s OK and then try again:
docker logs sql2019
Enabling SQL Server Agent
This way doesn’t actually work. I thought it worked because it looked like the agent was running, but when I ran a job, it said the agent wasn’t running.
USE master;
GO
EXEC sp_configure 'show advanced option', '1';
RECONFIGURE;
EXEC sp_configure 'Agent XPs', '1';
RECONFIGURE;
NOTE: You can also set the agent to run when you first create the container. I forgot this with my original creation so wanted to document the steps I took to enable it after the fact. If you want to enable it as part of container creation add this to the create:
-e "MSSQL_AGENT_ENABLED=True"If you don’t enable the agent as part of the container creation, you will need to bash into the container and put your container ID after root:
docker exec -it --user root cc03akdath bashOnce you are root, run this command to enable the agent:
/opt/mssql/bin/mssql-conf set sqlagent.enabled trueYou need to restart the SQL Server service after this change:
/opt/mssql/bin/sqlservr --stop && /opt/mssql/bin/sqlservrIf that path doesn’t work, then you can always search for it, or worst case, you can restart your container.
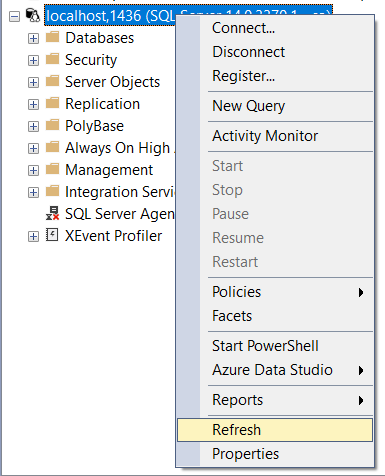
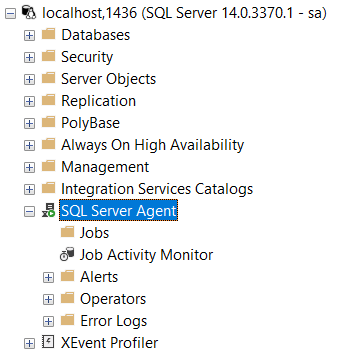
Once you’ve restarted your service or container, you can refresh your connection in SSMS:
SQL Server Agent jobs will run!
Restore Data and Settings with New Container
Let’s remove the container to see what happens when we recreated it. We mapped the volumes with the first creation of the container and we will once again map the volumes. Let’s stop and remove the container:
To stop the container on the command line: docker stop sql2019
To remove the container on the command line: docker rm sql2019
Next, you can run the same Docker run command as when you set it up the first time (as long as you didn’t remove the folder on your host computer):
docker run -e "ACCEPT_EULA=Y" -e "MSSQL_SA_PASSWORD=thisisastrongpassw0rd!" -p 1436:1433 --name sql2019 -v c:/docker/sql2019/data:/var/opt/mssql/data -v c:/docker/sql2019/secrets:/var/opt/mssql/secrets -d mcr.microsoft.com/mssql/server:2019-latestOnce the process is complete, connect to SSMS again:
And you will see the agent runs as expected without additional configuration steps! It remembers what you did as long as you map the volumes! This will also keep your databases and other settings intact.
I tried this all on 2017 version first and it doesn’t support linked servers (which I need), so had to update these instructions to 2019.
Docker seems like in an ever Alpha state of development, at least regarding documentation:
Persistence settings? Pick randomly and hope you are right with the current version:
-v c:\
-v “c:\”
-v ‘c:/’
-v ‘c:\’