

In today’s fast-paced digital world, keeping your data safe and accessible is more important than ever. That’s where Azure SQL Database steps in, offering a suite of tools to ensure your information is always within reach. Among these tools, failover groups shine, ready to jump into action whenever there’s a hiccup. So, let’s explore how failover groups in Azure SQL Database work their magic, ensuring your data stays safe and sound despite unexpected challenges.
Intro to Failover Groups
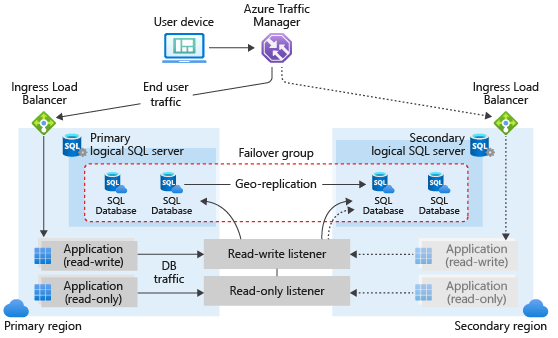
Basically, failover groups allow you to manage the replication and failover of some or all databases on a logical server to a logical server in another region.
Here is the architecture of failover groups:
Setting Up a Failover Group
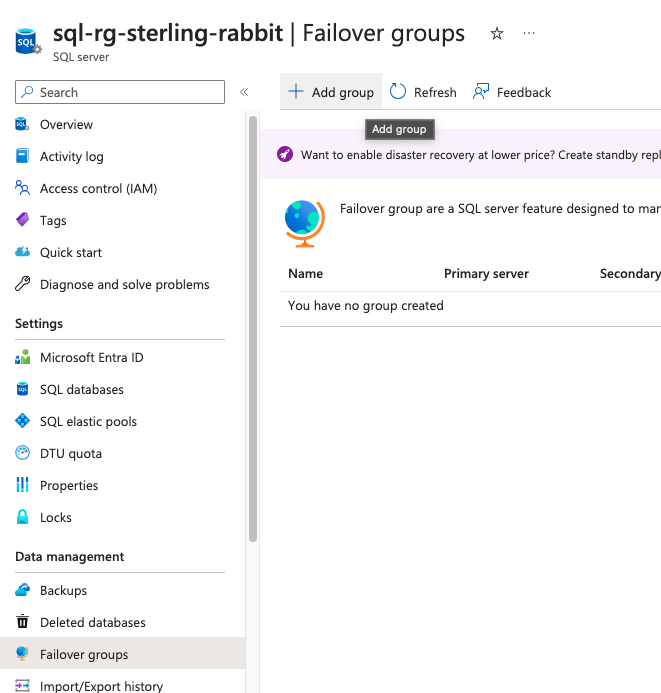
It’s very easy to set up a group. Go to your SQL Server, under Failover groups, and click Add group.
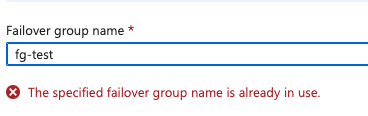
It has to have a unique name across Azure.
You can’t use a server from the same region.

So, I’ll create a new one.

Note: I picked a random region for the secondary server, but they recommend paired regions per Microsoft. Technically, I should have picked US Central as my primary is in East US 2.
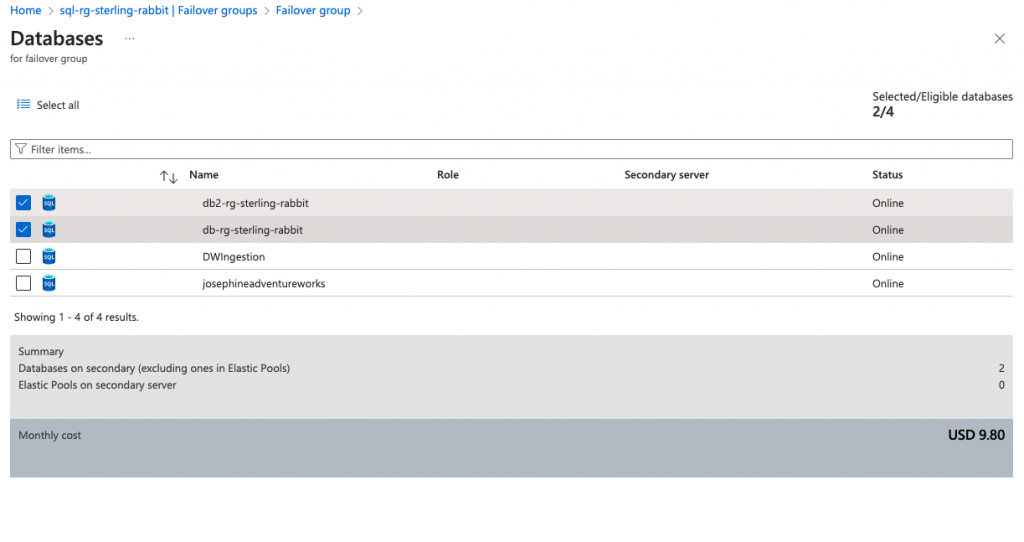
I will go ahead and add a couple of databases to it right now.
There is an initial seeding period. Then, I have a failover group.
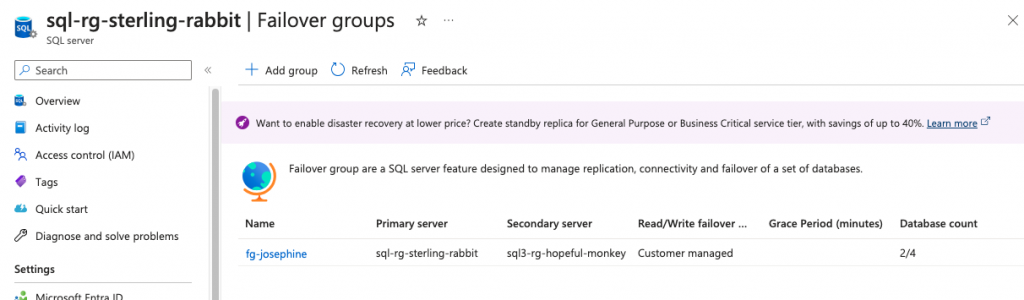
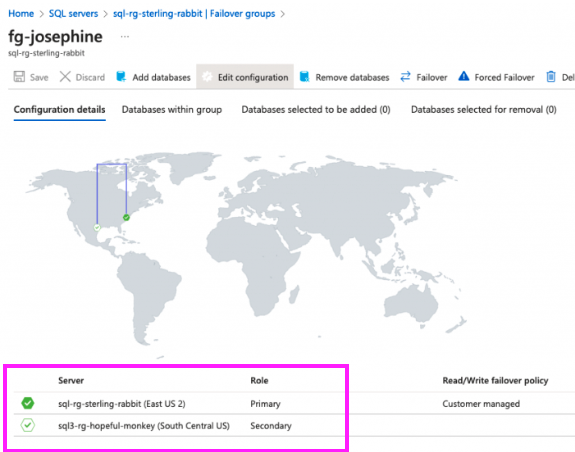
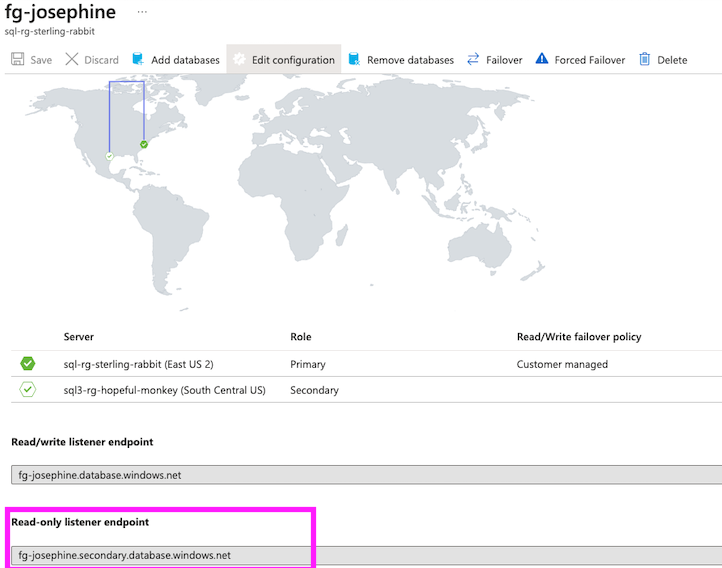
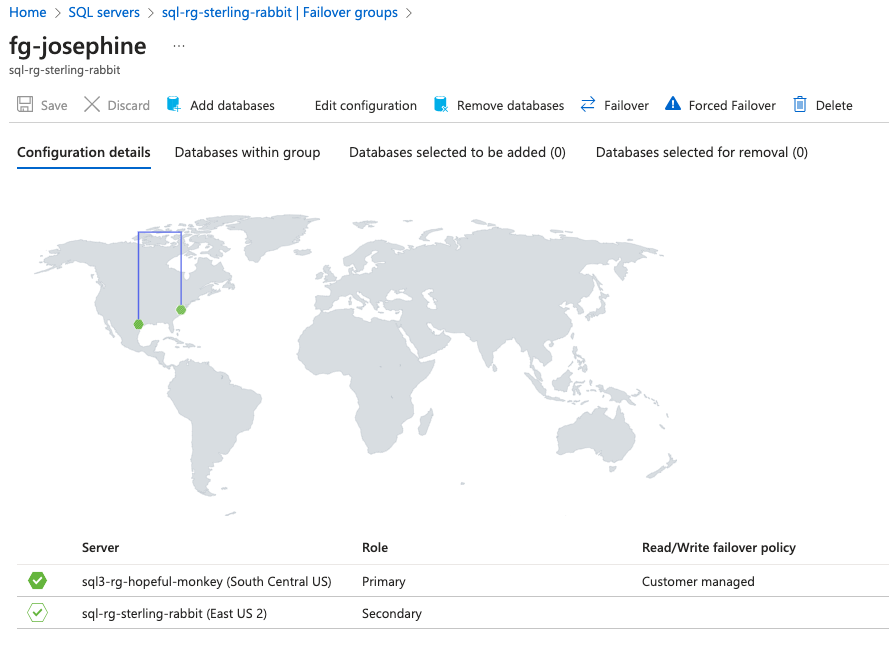
You can see in your failover group dashboard which server is primary and which is currently secondary.
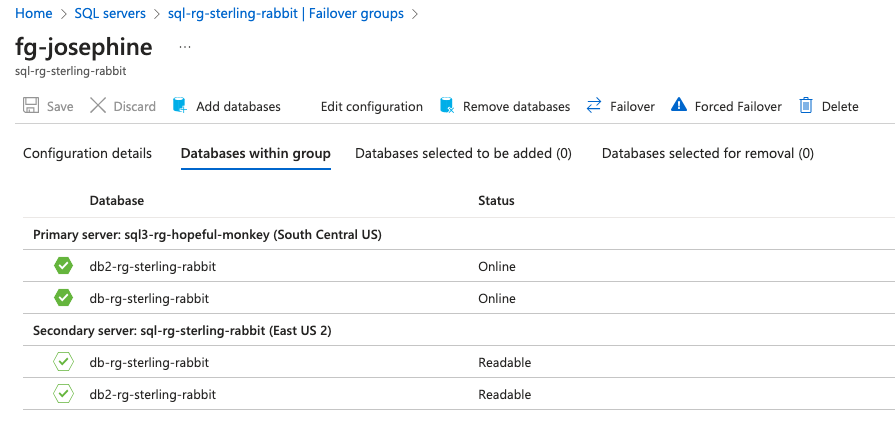
We can see the databases in the group. You can also add or remove databases from the failover group.
Making Configuration Changes
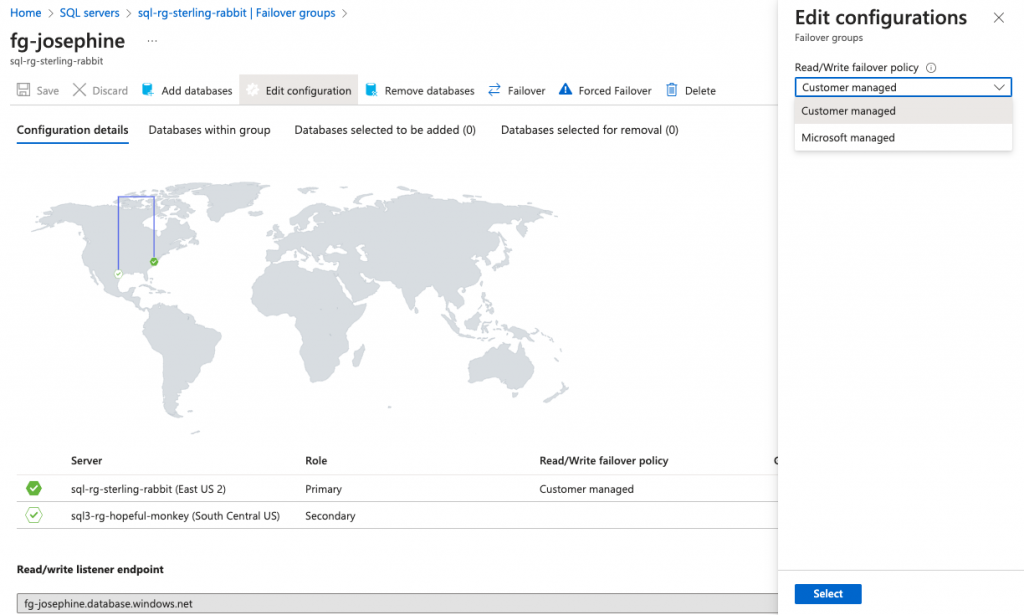
It will not fail over unless I trigger a failover because it’s Customer managed. If you want auto-failover in case of health issues with your server, you need to set that to Microsoft managed. Here is Microsoft’s explanation of the differences between them.
You can change that by editing your failover group, clicking Edit Configuration, and choosing Microsoft managed.
Pointing Read-Only Traffic at the Secondary
If you are familiar with ApplicationIntent=ReadOnly from Availability Groups, you can’t use it here. Instead, you have to use the read-only listener endpoint provided on your failover group dashboard.
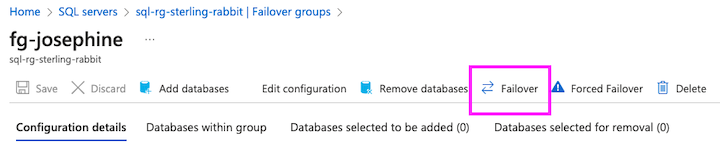
Failing Over to the Secondary
If you need to failover, making your secondary the primary is super easy. Just click the Failover button.
A box will pop up.
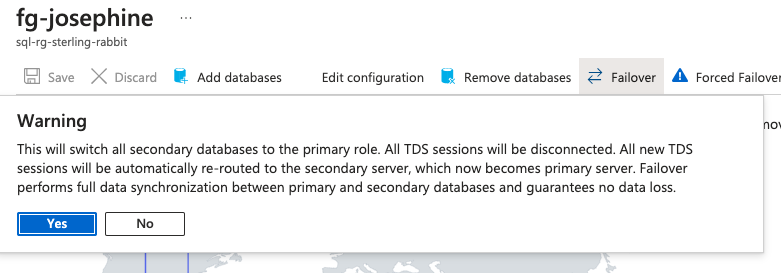
Note: For best performance with your apps, it’s recommended to “orchestrate the geo-failover of relevant application components together with the database.”
After clicking Yes, you get a notification.
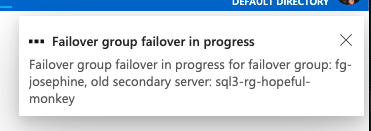
The Failover button is greyed out as it’s in the process of failing over.
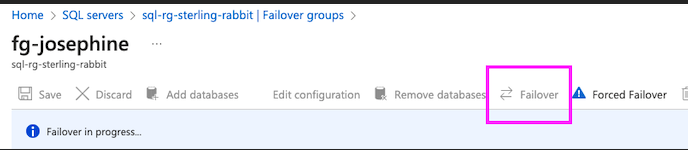
These are very small databases with practically no traffic, so it’s very quick, and we can see that the primary is now sql3.
You may have noticed there is a Forced Failover button. Don’t choose this unless you want data loss. There may be situations where an immediate failover to the secondary is necessary, but I would recommend avoiding this if possible to prevent data loss.
Alerting on Failover
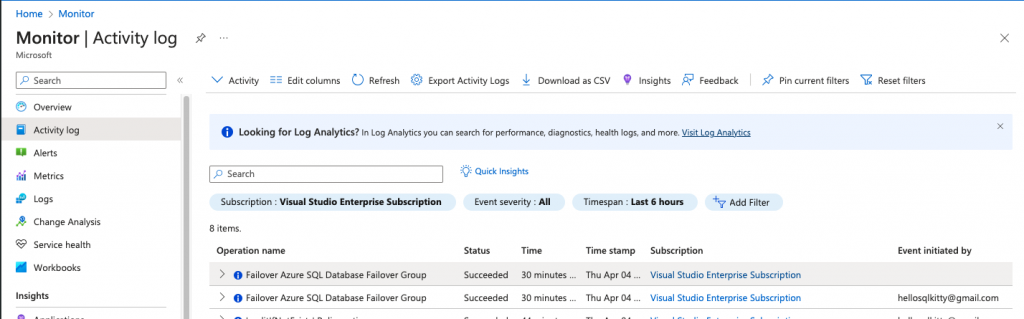
You can see when a failover has occurred by going into Azure Monitor – Activity Log.
If you initiate a failover manually, it will show up as ‘Azure SQL Database Failover Group Failover.’ If Microsoft initiates it for you, it will most likely appear as resolving a health event.
Per this post, we will need a diagnostic setting to store this log info in a Log Analytics Workspace using a diagnostic setting to alert on a failover. I tested this post’s instructions, and they work very nicely!
Here’s a high-level outline for those who don’t want to read that entire post:
- Click Export Activity Logs on the Activity Log in Monitor
- Create a diagnostic setting to capture Administrative logs into a Log Analytic Workspace. You might want a separate one for this, but I just stashed in an existing one for testing. Also, if you use Microsoft managed, you will need Resource Health. Otherwise, you can leave this off.
- Click on Logs in Monitor – and run this query:
AzureActivity
| where OperationNameValue contains(“Microsoft.Sql/servers/failoverGroups/failover/action”) and ActivityStatusValue ==”Start”
NOTE: it can take a bit for you to start seeing logs in the LAW – and it won’t put anything that happened in there before you set up the diagnostic setting. - Click New alert rule, and pretty much use the defaults there. Set the Threshold value to 0. Also, I set the alert severity to Warning instead of Informational.
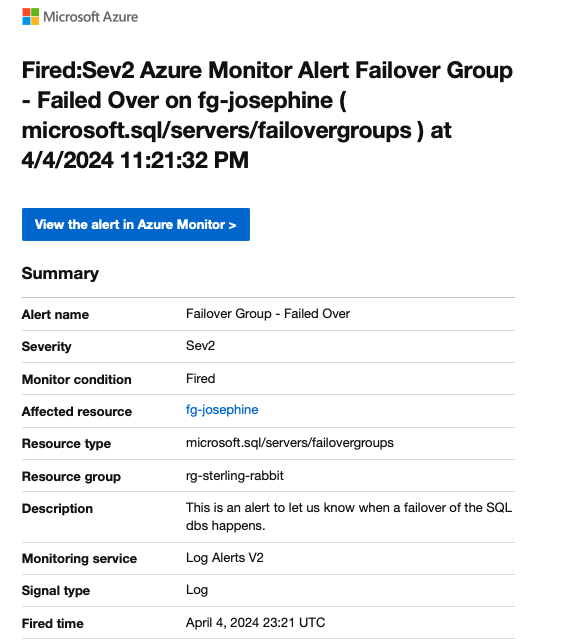
I failed over my group and waited for the alert. About 20 minutes later, I had an email.
In a nutshell, Azure SQL Database’s failover groups are always there to keep your data safe and accessible. They make setting up and managing replication and failover a breeze, giving you peace of mind knowing your information is in good hands. When the unexpected happens, the failover process is quick and smooth, minimizing any disruption to your operations. And with Azure Monitor keeping an eye on things, you’ll always be the first to know if anything goes awry. So, with failover groups by your side, you can rest easy knowing your data is safe and sound, no matter what comes your way!